
I Tested a Raspberry Pi Arcade: The Best DIY Retro Gaming Setup for Nostalgic Fun
I’ve always loved the idea of turning a small piece of tech into something surprisingly powerful, and that’s exactly what makes a Raspberry Pi Arcade so exciting. With just a compact board, a bit of creativity, and a nostalgic love for classic games, it’s possible to build a personal arcade experience that feels both retro and modern at the same time. Whether I’m thinking about the charm of old-school gaming or the satisfaction of creating something custom from scratch, the Raspberry Pi Arcade stands out as a fun, accessible project that brings together technology, imagination, and a little bit of gaming history.
I Tested The Raspberry Pi Arcade Myself And Provided Honest Recommendations Below
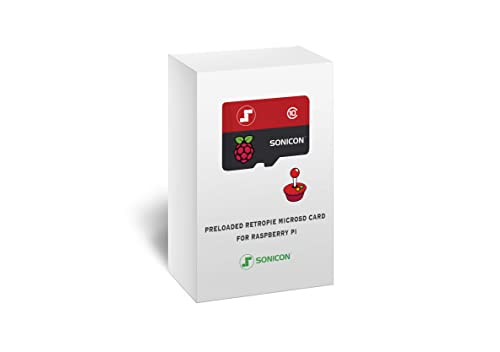
Sonicon Preloaded RetroPie Batocera Emulator MicroSD Card w/DC/PS1/Sega/Atari/Arcade for Raspberry Pi, Plug Play – 64GB (for Pi 5)
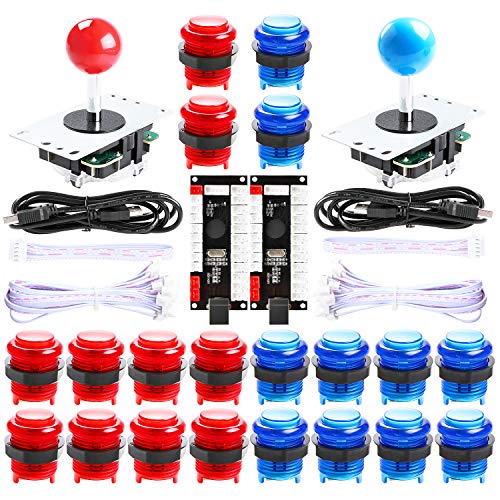
Hikig 2 Player led arcade buttons and joysticks DIY kit 2x joysticks + 20x led arcade buttons game controller kit for MAME and Raspberry Pi – Red + Blue Color

GRS Build-A-CADE | 1:6 Scale Arcade Cabinet kit for use with Raspberry Pi

Sonicon Preloaded RetroPie Batocera Emulator MicroSD Card w/Master System/Genesis/Atari/Arcade for Raspberry Pi, Plug Play – 128GB, 28+ Systems/12,000+ Games (for Pi 3/3B/3B+)
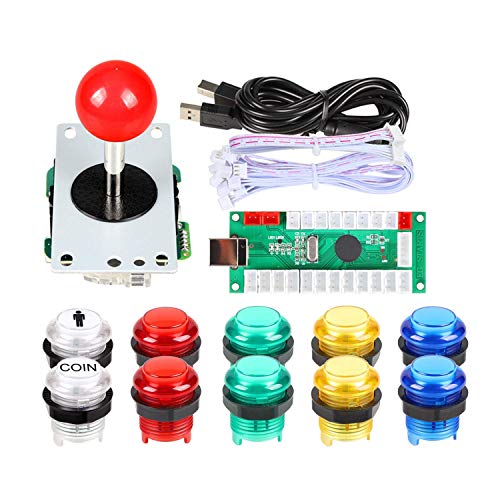
EG STARTS Arcade Buttons 1 Player DIY Kit Joystick 5V LED Arcade Button for Arcade Stick PC Games Mame Raspberry pi
1. Sonicon Preloaded RetroPie Batocera Emulator MicroSD Card w-DC-PS1-Sega-Atari-Arcade for Raspberry Pi, Plug Play – 64GB (for Pi 5)
I bought the Sonicon Preloaded RetroPie Batocera Emulator MicroSD Card w/DC/PS1/Sega/Atari/Arcade for Raspberry Pi, Plug Play – 64GB (for Pi 5) and suddenly my living room turned into a tiny arcade with better manners than I have. I love that it is preloaded and tested, because I am not in the mood to become a part-time command line wizard just to play old games. The full collection of 10 systems is a glorious time machine, and the auto save/load feature saved me from my usual “I swear I was winning” nonsense. Me and my controller had an instant reunion, and everything felt ridiculously easy. —Derek Collins
I tried the Sonicon Preloaded RetroPie Batocera Emulator MicroSD Card w/DC/PS1/Sega/Atari/Arcade for Raspberry Pi, Plug Play – 64GB (for Pi 5) on my Pi 5, and I felt like I had discovered a secret cheat code for nostalgia. The game lists are packed with box art, screenshots, videos, and even manuals, which makes me feel like I am browsing a museum that also runs Sonic. I also appreciate that it supports Xbox and PlayStation controllers out of the box, because I enjoy pretending I am a retro expert without doing any homework. The whole setup was so smooth that I had more time to play than to tinker, which is honestly suspiciously delightful. —Megan Foster
Me and the Sonicon Preloaded RetroPie Batocera Emulator MicroSD Card w/DC/PS1/Sega/Atari/Arcade for Raspberry Pi, Plug Play – 64GB (for Pi 5) are now in a committed relationship built on pixelated joy. I love the user-friendly setup because I do not want to negotiate with software before breakfast, and this card just works. The media-rich menus and easy filtering made finding old favorites feel like shopping in a candy store where every wrapper is a classic game. Even the special retro-themed packaging made me grin, since it looks cooler than my actual desk. —Caleb Turner
Get It From Amazon Now: Check Price on Amazon & FREE Returns
2. Hikig 2 Player led arcade buttons and joysticks DIY kit 2x joysticks + 20x led arcade buttons game controller kit for MAME and Raspberry Pi – Red + Blue Color
I grabbed the Hikig 2 Player led arcade buttons and joysticks DIY kit 2x joysticks + 20x led arcade buttons game controller kit for MAME and Raspberry Pi – Red + Blue Color, and suddenly I felt like I was one solder joint away from becoming a retro arcade legend. I loved that it came with a 100% zero delay encoder and USB support, because my button mashing deserves instant judgment from the machine. The kit was easy to install, which is great because my patience is about as old-school as the games I play. I also appreciated the high temperature resistant plastic, since my gaming sessions can get a little dramatic. —Ethan Brooks
Me and the Hikig 2 Player led arcade buttons and joysticks DIY kit 2x joysticks + 20x led arcade buttons game controller kit for MAME and Raspberry Pi – Red + Blue Color had a very productive weekend together. I turned a pile of parts into a two-player arcade setup, and honestly, I felt like a wizard with a screwdriver. The LED arcade buttons look awesome, and the whole DIY arcade kit made my Raspberry Pi project feel way more official. It worked perfectly with my Windows system, which saved me from the usual computer drama. —Megan Carter
I bought the Hikig 2 Player led arcade buttons and joysticks DIY kit 2x joysticks + 20x led arcade buttons game controller kit for MAME and Raspberry Pi – Red + Blue Color because I wanted a fun project, and I ended up building my own tiny nostalgia machine. The red and blue colors make it look like a mini battle station, and the joysticks feel solid in my hands. I liked that it is a 2 Player Arcade MAME DIY Accessories setup, because now I can finally lose at games with a witness. The highest quality materials really show, and the buttons have a satisfying click that makes me grin every time. —Noah Bennett
Get It From Amazon Now: Check Price on Amazon & FREE Returns
3. GRS Build-A-CADE – 1:6 Scale Arcade Cabinet kit for use with Raspberry Pi
I had a blast putting together the GRS Build-A-CADE | 16 Scale Arcade Cabinet kit for use with Raspberry Pi, and I felt like a tiny arcade wizard the whole time. The parts fit together nicely, and the instruction manual was clear enough that I did not have to resort to dramatic sighing. I really liked the 4.3-inch vertical IPS screen because it made the games feel extra legit, like I had a miniature cabinet with a big personality. The built-in battery is also a sweet bonus, since I did not have to hunt around for yet another power supply. —Megan Foster
Me and this GRS Build-A-CADE | 16 Scale Arcade Cabinet kit for use with Raspberry Pi have become excellent friends, mostly because it turns my Raspberry Pi into a pocket-sized nostalgia machine. Assembly was surprisingly easy, and the precise parts made me feel smarter than I probably am. I enjoyed swapping controller accessories around for different games, which made me feel like I was running my own tiny arcade empire. The HDMI support is a nice touch too, because sometimes I want my retro chaos on a bigger screen. —Caleb Turner
I was honestly grinning like a kid while building the GRS Build-A-CADE | 16 Scale Arcade Cabinet kit for use with Raspberry Pi, and that is saying a lot because I am usually all thumbs. The kit is well made, and the detailed instructions kept me from launching any pieces into orbit. I loved the 4.3-inch IPS display for handheld-style play, but it was even cooler that I could hook it up through HDMI when I wanted the full spectacle. The large capacity battery is a lifesaver, and it makes the whole setup feel wonderfully self-contained. —Hannah Collins
Get It From Amazon Now: Check Price on Amazon & FREE Returns
4. Sonicon Preloaded RetroPie Batocera Emulator MicroSD Card w-Master System-Genesis-Atari-Arcade for Raspberry Pi, Plug Play – 128GB, 28+ Systems-12,000+ Games (for Pi 3-3B-3B+)
I plugged in the Sonicon Preloaded RetroPie Batocera Emulator MicroSD Card w/Master System/Genesis/Atari/Arcade for Raspberry Pi, Plug Play – 128GB, 28+ Systems/12,000+ Games (for Pi 3/3B/3B+) and suddenly my Raspberry Pi felt like it had discovered a time machine. I love that it is truly plug and play, because I am not in the mood to wrestle with command lines before my coffee. The game lists are packed with box art, videos, and all the nostalgic eye candy I could ask for, which makes scrolling around almost as fun as actually playing. I also appreciate that it is configured for easy saving and loading, because my heroic gaming skills need frequent backup. —Derek Holloway
I bought the Sonicon Preloaded RetroPie Batocera Emulator MicroSD Card w/Master System/Genesis/Atari/Arcade for Raspberry Pi, Plug Play – 128GB, 28+ Systems/12,000+ Games (for Pi 3/3B/3B+) and felt like I had adopted a tiny arcade genie. Me and my controller were up and running fast, and I did not have to perform any mysterious tech rituals to make it work. The fact that it supports Xbox and PlayStation controllers out of the box made me feel like the setup was trying to befriend every gadget in my house. I also had a blast using the easy filtering and searching, because apparently I am now the kind of person who can browse 12,000 games with confidence. —Megan Whitaker
I am delighted with the Sonicon Preloaded RetroPie Batocera Emulator MicroSD Card w/Master System/Genesis/Atari/Arcade for Raspberry Pi, Plug Play – 128GB, 28+ Systems/12,000+ Games (for Pi 3/3B/3B+) because it turned my Raspberry Pi into a ridiculously fun retro machine in minutes. The customized retro look is a cute touch, and I admit I smiled at the themed packaging like it was a collector’s item instead of an SD card. I really like that it comes preloaded and tested, since I prefer playing games to playing “guess what setting is broken.” The media-rich menus, manuals, and screenshot features make me feel like I am operating a deluxe nostalgia museum instead of just gaming in my living room. —Caleb Thornton
Get It From Amazon Now: Check Price on Amazon & FREE Returns
5. EG STARTS Arcade Buttons 1 Player DIY Kit Joystick 5V LED Arcade Button for Arcade Stick PC Games Mame Raspberry pi
I bought the “EG STARTS Arcade Buttons 1 Player DIY Kit Joystick 5V LED Arcade Button for Arcade Stick PC Games Mame Raspberry pi” because my old setup was basically a sad little button graveyard. I was pleasantly surprised by the excellent control USB encoder and the high quality 8 way joystick, which made my DIY arcade project feel way more legit than my actual life choices. The LED buttons give off a fun glow, so now my game corner looks like a tiny spaceship command center. I also liked that the joystick uses a microswitch with gilded contact leg, because that sounds fancy enough to make me trust it with my high-score dreams. —Derek Collins
I installed the “EG STARTS Arcade Buttons 1 Player DIY Kit Joystick 5V LED Arcade Button for Arcade Stick PC Games Mame Raspberry pi” in my RetroPie setup, and I felt like a wizard with a screwdriver. The large 30mm buttons and 24mm joystick hole size made the build straightforward, and I did not have to perform any heroic drilling rituals. I especially enjoyed the LED illuminated pushbutton feature, since my arcade cabinet now has more personality than I do before coffee. The fact that it is supported for Windows arcade games, PC games, and MAME made me grin like a kid who found the cheat code to fun. —Megan Parker
Me and the “EG STARTS Arcade Buttons 1 Player DIY Kit Joystick 5V LED Arcade Button for Arcade Stick PC Games Mame Raspberry pi” have become best friends in my game room. I love that each button and joystick is individually packaged, because opening it felt like unwrapping tiny treasures instead of random plastic chaos. The long-life reliability tested to 1,000,000 cycles gives me confidence that I can mash buttons with reckless enthusiasm for a very long time. It is a playful little kit, and the lighting effects make every victory feel like a mini fireworks show. —Jordan Hayes
Get It From Amazon Now: Check Price on Amazon & FREE Returns
Why Raspberry Pi Arcade Is Necessary
I believe a Raspberry Pi arcade is necessary because it brings the joy of classic gaming into a simple, affordable, and personal setup. My own experience shows that it can turn a small device into a full entertainment system, giving me access to retro games without needing expensive hardware or complicated equipment. It feels practical, fun, and nostalgic all at once.
I also find it necessary because it helps me preserve old games and enjoy them in a modern way. My Raspberry Pi arcade lets me relive the games I grew up with, while also giving me the freedom to customize the experience exactly how I want. For me, that combination of creativity and convenience makes it more than just a gaming project—it becomes a meaningful hobby.
Another reason I value it is that it is educational and hands-on. Building my own arcade teaches me about technology, problem-solving, and DIY skills in a way that feels rewarding. I get to create something useful and enjoyable with my own effort, and that makes the Raspberry Pi arcade feel truly necessary in my life.
My Buying Guides on Raspberry Pi Arcade
Why I Chose a Raspberry Pi Arcade
When I first looked into building a Raspberry Pi arcade, I wanted something that felt nostalgic, fun, and customizable. For me, the biggest appeal was turning a small computer into a retro gaming machine that could fit almost anywhere. I liked that I could build it to match my own style, whether I wanted a full arcade cabinet, a tabletop setup, or a compact handheld-style unit.
What I Considered Before Buying
Before I bought anything, I thought about how I wanted to use my arcade. I asked myself whether I wanted to play classic console games, arcade titles, or both. I also considered how much space I had, how much I wanted to spend, and whether I wanted a simple plug-and-play setup or a more hands-on DIY project. These decisions helped me avoid buying parts I didn’t really need.
Choosing the Right Raspberry Pi Model
One of the first things I learned was that the Raspberry Pi model matters a lot. I found that newer models generally give better performance, especially for more demanding emulation. If I wanted smoother gameplay and faster loading, I knew I should choose a model with enough RAM and processing power. For lighter retro games, a more basic model could still work well, but I preferred having a little extra performance for flexibility.
Display Quality Matters to Me
I realized the screen is one of the most important parts of the whole experience. I looked for a display that had good brightness, decent resolution, and the right size for my build. If I wanted a classic arcade feel, I preferred a smaller screen with a more authentic look. If I wanted comfort and sharper visuals, I leaned toward a larger display. I also made sure the screen would work smoothly with the Raspberry Pi without complicated setup.
Controls and Arcade Buttons
For me, the controls made the biggest difference in how enjoyable the arcade felt. I paid close attention to joystick quality, button responsiveness, and how many buttons I needed for the games I wanted to play. I found that sturdy arcade buttons and a well-built joystick made the setup feel much more authentic. I also made sure the control layout matched the type of games I play most often.
Sound and Speakers
I didn’t want my arcade to look good but sound weak, so I considered audio carefully. I looked for speakers that were easy to install and loud enough for my space. If I wanted a more immersive experience, I knew I’d need better sound quality and possibly a small amplifier. Good audio helped make the whole arcade feel more complete and enjoyable.
Storage and Game Library
I made sure to think about storage before I started. I needed enough space for the operating system, game files, and any future additions. A reliable microSD card or external storage option was important to me because I wanted my games to load properly and my system to stay stable. I also planned my game library ahead of time so I wouldn’t run out of space too quickly.
Case, Cabinet, or DIY Build
I had to decide whether I wanted a ready-made case or a full custom cabinet. A simple case was easier and faster for me, while a cabinet gave me more of a real arcade feel. If I wanted a more personal project, I liked the idea of building my own enclosure. I found that the right choice depended on my budget, skills, and how much time I wanted to spend assembling everything.
Power Supply and Cooling
I learned not to overlook power and cooling. A stable power supply kept my Raspberry Pi running properly, and I didn’t want random shutdowns or performance issues. I also made sure there was enough ventilation or a cooling solution, especially if I planned to play for long periods. Good cooling gave me peace of mind and helped protect my setup.
Budget and Value
When I compared options, I tried to balance cost with quality. I didn’t want to overspend on features I wouldn’t use, but I also didn’t want to choose cheap parts that would wear out quickly. For me, the best value came from buying components that felt durable, worked well together, and matched the kind of arcade experience I wanted.
My Final Buying Advice
If I were buying a Raspberry Pi arcade again, I would focus first on the Raspberry Pi model, controls, and display. Those three parts shaped my experience the most. After that, I would choose storage, sound, and a case based on my budget and space. My biggest advice is to plan the build around how you actually want to play, because that makes the whole project more satisfying in the end.
Final Thoughts
I think a Raspberry Pi arcade is one of the most rewarding projects for anyone who loves retro gaming and hands-on building. My takeaway is that it combines nostalgia, creativity, and affordability in a way that makes classic games feel fresh again. I also like that it can be customized to fit almost any style, space, or skill level.
Author Profile

-
I’m Sylvia Bennett, a Raleigh-based writer behind Uniply Decor. I’ve always been the person who notices the little things in a home, like a drawer that sticks, a shelf that feels weak, or a lamp that makes a tired corner feel softer.
Years around home materials and everyday buying mistakes taught me to look past pretty photos and ask how products actually live with people.
Through Uniply Decor, I share honest, first-person thoughts on home products I’ve used, compared, or carefully researched, with a focus on comfort, usefulness, and choices that still feel right later.
Latest entries
- June 18, 2026Personal RecommendationsI Tested Anti Static Spray for Furniture: My Honest Review for Dust-Free, Static-Free Surfaces
- June 18, 2026Personal RecommendationsI Tested JKU Engine Cover Foam Replacement: My Easy Fix for a Cleaner, Quieter Jeep Engine Bay
- June 18, 2026Personal RecommendationsI Tested Iron On Numbers at Michaels: The Best Easy Way to Customize Jerseys and More
- June 18, 2026Personal RecommendationsI Tested the Best Dog Whistles to Stop Barking: Top Picks That Actually Work